
Rugs are more than just floor coverings; they’re works of art that can tie a room together and add warmth and character. Over time, however, the colors on an old rug can fade, leaving it looking tired and dull. Instead of replacing it, consider giving your old rug a fresh lease on life by repainting it. In this article, we’ll explore the steps to completely repaint an old rug and transform it into a vibrant centerpiece for your home.
Why Repaint Your Old Rug?
Repainting an old rug can offer several advantages:
- Cost-Effective: It’s a budget-friendly way to revitalize your existing rug rather than investing in a new one.
- Customization: You can choose colors and patterns that match your current decor or experiment with new styles.
- Sustainability: Repurposing and refreshing old items aligns with eco-friendly practices, reducing waste.
- Creative Outlet: Painting your rug is a creative project that allows you to express your style and artistry.
Materials You’ll Need
Before you embark on repainting your old rug, gather the following materials:
- Old Rug: Choose a rug with a flat, low-pile surface for better paint adhesion.
- Fabric Paint: Acrylic fabric paint is an excellent choice for durability and color vibrancy.
- Paintbrushes: Different brush sizes for fine details and larger areas.
- Painter’s Tape: To create clean edges and patterns.
- Palette: For mixing and diluting paint.
- Stencil (optional): If you want to create intricate patterns or designs.
- Fabric Medium (optional): To mix with acrylic paint for better flexibility and adhesion on fabric.
Steps to Repaint Your Old Rug
Follow these steps to repaint your old rug:
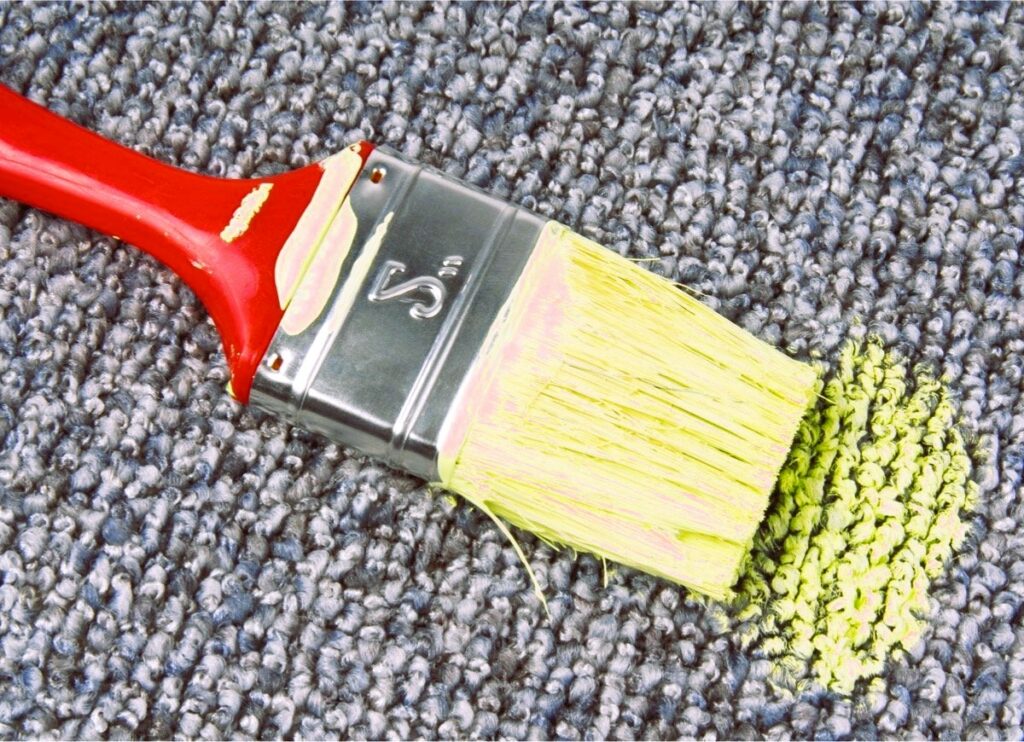
1. Clean the Rug:
- Vacuum the rug thoroughly to remove dust and debris.
- Use a carpet cleaner or mild detergent to clean any stains or dirt. Allow it to dry completely.
2. Design Planning:
- Decide on the color scheme and design you want for your rug.
- Use painter’s tape to mark off areas and create patterns if desired. Do you like the article? Read also about creating a home office.
3. Mix Paint:
- If using acrylic paint, consider mixing it with a fabric medium to enhance flexibility and adhesion on the rug.
4. Start Painting:
- Begin by painting the background color if you have one.
- Use different brushes and techniques for solid colors, gradients, or patterns.
- Allow each layer to dry before adding additional coats to avoid smudging or bleeding.
5. Stenciling (Optional):
- If you’re using stencils, carefully position them on the rug and apply paint evenly.
- Let the paint dry before removing the stencil.
6. Dry and Seal:
- Allow the paint to dry thoroughly for at least 24 hours.
- To seal the paint and protect it from wear, apply a fabric sealer or a clear, water-based polyurethane.
7. Final Touches:
- Once the paint and sealer are dry, trim any uneven edges or loose threads for a polished look.
Canadian DIY Standards
To ensure that your rug repainting project aligns with Canadian DIY standards and safety regulations, you can refer to resources such as Wikipedia. These sources can provide guidance on specific standards or requirements related to DIY projects in Canada.
In conclusion, repainting an old rug is a creative and cost-effective way to breathe new life into your home decor. With some patience and artistic flair, you can turn your tired rug into a unique piece that complements your interior design. So, roll up your sleeves, grab your paintbrushes, and get ready to transform your old rug into a stunning work of art.